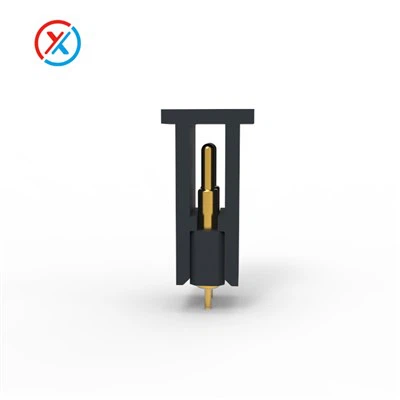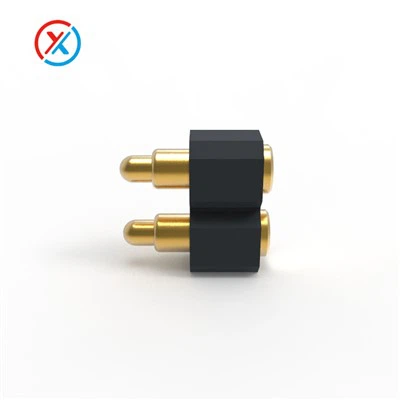
As a supplier of DIP pogo pins, I've encountered various issues related to pogo pin failures over the years. In this blog, I'll share some effective troubleshooting methods to help you address these problems.
Understanding DIP Pogo Pins
Before we dive into troubleshooting, let's briefly understand what DIP pogo pins are. DIP (Dual In - line Package) pogo pins are spring - loaded pins commonly used in electronic applications. They provide a reliable electrical connection between two or more components. These pins are known for their durability, high - precision, and ability to handle different current and voltage levels. For example, our Gold-Plated Pogo Pins 12V DC 1A are designed to meet specific electrical requirements in various devices.
Common Causes of DIP Pogo Pin Failures
1. Mechanical Wear and Tear
One of the most common causes of pogo pin failures is mechanical wear. Over time, the repeated compression and extension of the spring - loaded pins can lead to fatigue. The tip of the pin may also wear down, especially if it is in frequent contact with a hard surface. This wear can result in a poor electrical connection or even complete failure of the pin.
2. Contamination
Contamination is another significant factor. Dust, dirt, and other particles can accumulate on the surface of the pogo pins. This can create a barrier between the pin and the contact point, preventing a proper electrical connection. In some cases, chemical contaminants can also corrode the pins, further degrading their performance.
3. Incorrect Installation
Improper installation of DIP pogo pins can cause immediate or long - term failures. If the pins are not inserted correctly into the PCB (Printed Circuit Board) or other components, they may not make proper contact. This can lead to intermittent electrical connections, which are often difficult to diagnose.
4. Electrical Overload
Exceeding the rated current or voltage of the pogo pins can cause damage. High - current applications can generate excessive heat, which can weaken the spring and damage the plating on the pins. Over time, this can lead to a breakdown of the electrical connection.


Troubleshooting Steps
Step 1: Visual Inspection
The first step in troubleshooting pogo pin failures is a visual inspection. Check the pins for any signs of physical damage, such as bent tips, broken springs, or visible wear. Look for any signs of contamination, such as dirt or corrosion on the surface of the pins. If you notice any visible damage, replace the affected pins immediately.
Step 2: Cleaning
If the pins appear dirty or contaminated, cleaning them can often restore their functionality. Use a suitable cleaning agent, such as isopropyl alcohol, and a soft brush to gently clean the surface of the pins. Be careful not to damage the pins during the cleaning process. After cleaning, dry the pins thoroughly before reinstalling them.
Step 3: Check the Installation
Verify that the pogo pins are installed correctly. Make sure they are properly seated in the PCB or other components. Check for any loose connections or misaligned pins. If necessary, remove and reinstall the pins to ensure a proper fit.
Step 4: Electrical Testing
Use a multimeter to test the electrical continuity of the pogo pins. Set the multimeter to the resistance or continuity mode and touch the probes to the two ends of the pin. A good pin should have a very low resistance. If the resistance is high or infinite, it indicates a problem with the pin, and it may need to be replaced.
Step 5: Evaluate the Electrical Load
Check if the electrical load on the pogo pins is within the rated specifications. If the pins are being used in an application that exceeds their current or voltage ratings, consider replacing them with pins that can handle the higher load. For example, if you need higher - current pins, our Pogo Contact Pins may be a suitable option.
Preventive Measures
1. Quality Selection
Choose high - quality pogo pins from a reliable supplier. High - quality pins are made from better materials and are more resistant to wear and corrosion. At our company, we ensure that all our Pogo Pin Charging Pins are manufactured to the highest standards.
2. Proper Installation
Follow the manufacturer's installation instructions carefully. Use the correct tools and techniques to ensure that the pins are installed correctly. This can help prevent premature failures due to incorrect installation.
3. Regular Maintenance
Perform regular maintenance on the pogo pins. This includes visual inspections, cleaning, and electrical testing. By detecting and addressing potential problems early, you can extend the lifespan of the pins and prevent major failures.
Conclusion
Troubleshooting DIP pogo pin failures requires a systematic approach. By understanding the common causes of failures and following the troubleshooting steps outlined above, you can effectively diagnose and resolve most issues. Additionally, taking preventive measures can help ensure the long - term reliability of your pogo pins.
If you are facing issues with DIP pogo pins or are interested in purchasing high - quality pogo pins for your projects, feel free to contact us for more information and to discuss your specific requirements. We are here to provide you with the best solutions and support.
References
- "Electronic Connector Handbook" by John M. Coombs
- "Fundamentals of Electrical Engineering" textbooks